Introduction
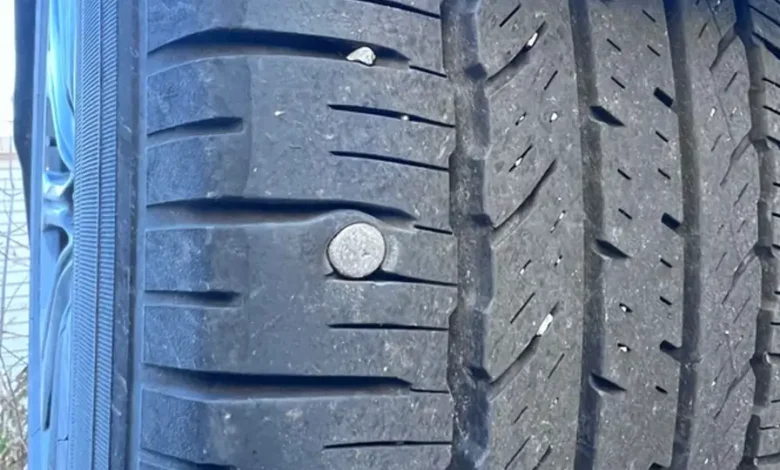
Every driver has, at some point, encountered sharp objects like nails on the road, causing uncertainty and concern. It’s a frustrating moment when you notice a nail embedded in your tire but don’t see an immediate flat tire.
What should you do when you find a nail in your tire, but it’s not flat? Is it safe to drive, and what steps should you take next?
In this blog, we’ll explore expert advice on how to identify a nail in your tire, assess the damage, and safely fix the issue. Our aim is to provide clear, actionable guidance to keep you safe on the road and prevent costly repairs down the line.
Can You Drive with a Nail in Your Tire but Not Flat?
Driving with a nail in your tire might seem harmless, but hidden damage could lead to costly repairs or accidents.
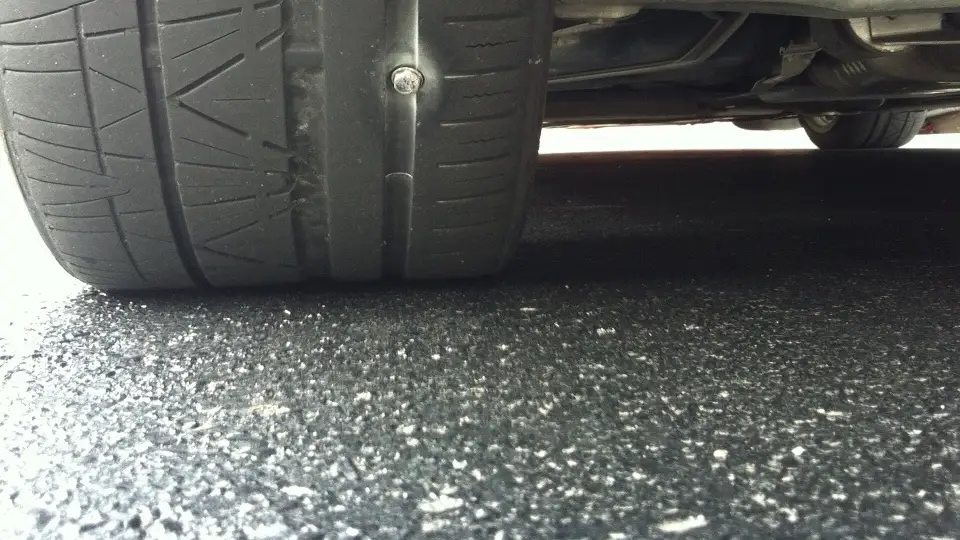
Yes, it’s possible to drive with a nail in your tire, but this depends on several factors. If the puncture is small and there’s no noticeable air leakage, you can continue driving for a short distance. However, it’s crucial to check the nail’s location. A nail lodged in the tread (center of the tire) might not cause immediate air loss, making it safer to drive temporarily. On the other hand, if the nail is near the sidewall or causing air to escape, it becomes a serious safety risk.
Visual Inspection Tips
Before you hit the road, perform a quick visual inspection of the tire:
- Check Tire Pressure: Use a tire pressure gauge to ensure that the air pressure remains stable. If the pressure is dropping, avoid driving any further.
- Look for Visible Damage: Examine the area around the nail to see if there’s a bulge, tear, or any other signs of damage to the tire.
- Monitor the Tire’s Condition Regularly: Keep an eye (or ear) out for changes in tire pressure, steering stability, or strange sounds like a clicking noise.
Safety Precautions
Even if the tire isn’t visibly damaged, it’s essential to exercise caution. If you’re unsure whether the nail has penetrated the tire deeply or if the tire’s pressure seems to be slowly decreasing, it’s better to stop at a safe location. Always switch on your hazard lights and pull over in a safe area. In such situations, seeking professional assistance from a tire technician is the best way to avoid further damage or potential accidents.

How to Identify a Nail in Your Tire
Reduced Tire Pressure
One of the most reliable indicators of a nail in your tire is reduced tire pressure. Most modern vehicles come equipped with a Tire Pressure Monitoring System (TPMS), which alerts you when the pressure in your tires drops below a safe level. However, it’s a good idea to manually check tire pressure if you suspect a problem:
- Using TPMS: Keep an eye on your dashboard. If the TPMS light comes on, it could mean gradual air loss due to a nail puncture.
- Manual Check with a Gauge: Even without a TPMS alert, it’s wise to use a tire pressure gauge to manually monitor the pressure. Compare the current reading with the manufacturer’s recommended PSI (pounds per square inch). A slow decrease in pressure could signal a nail puncture.
Clicking Noise While Driving
Sometimes, you may hear a clicking or tapping noise while driving. This noise often comes from a nail or screw lodged in the tire tread. As the tire rotates, the object hits the pavement repeatedly, creating a rhythmic sound:
- Detecting the Noise: Turn down your radio and listen closely as you drive at lower speeds. If the clicking noise is constant and speeds up or slows down with the car, you may have something embedded in your tire.
 Visual Check
Performing a visual inspection is the simplest way to identify a nail or other object in your tire. Here’s how to conduct a thorough check:
- Park in a Well-Lit Area: Ensure you have good visibility, either using natural light or a flashlight.
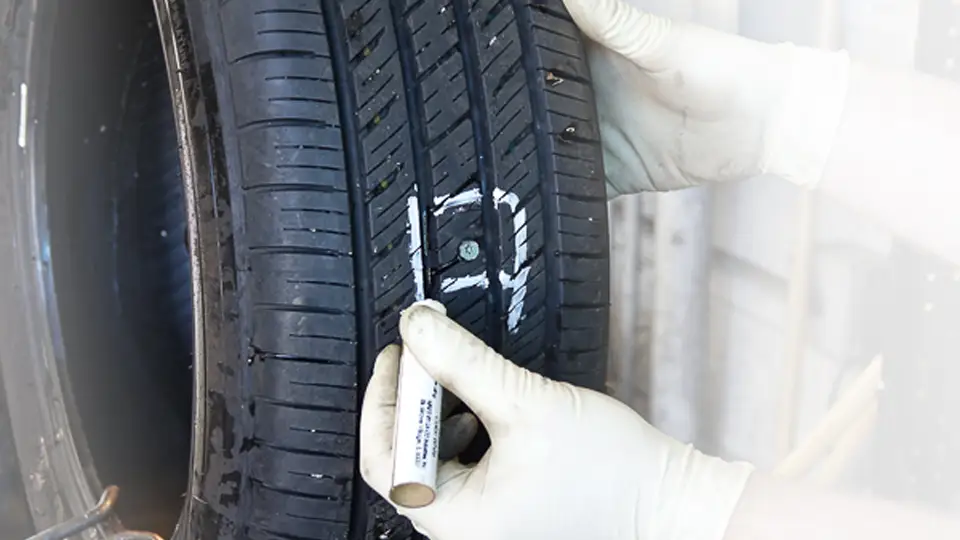
- Inspect the Tread Area: Look closely at the surface of the tire’s tread. Run your hand gently over the tire to feel for any sharp objects.
- Check Between the Treads: Nails or screws often get stuck in the grooves of the tread. Carefully examine the spaces between the tread blocks for any small objects.
- Inspect the Sidewalls: While it’s less common for nails to lodge in the sidewalls, it’s still possible. Be sure to check for any bulges or unusual marks on the side of the tire.
By following these steps, you can easily spot a potential issue before it becomes dangerous.
Steps to Take When You Find a Nail in Your Tire
Immediate Actions
If you discover a nail in your tire while driving, it’s essential to act quickly but calmly:
- Pull Over Safely: Find a safe location to stop, such as the shoulder of the road or a parking lot. Turn on your hazard lights to alert other drivers that you’ve stopped.
- Perform a Quick Pressure Check: Once you’ve stopped, check the tire pressure if possible. You can either use your vehicle’s TPMS (if equipped) or a manual tire pressure gauge. A significant drop in pressure is a clear sign that you need immediate assistance.
Safe Driving Advice
If the nail is causing minimal air loss and the tire isn’t flat, it may be safe to drive for a short distance, but you should be cautious:
- When It’s Safe to Drive Slowly: If the tire pressure is stable and there’s no visible damage, you can drive slowly to the nearest repair shop. Keep your speed low, and avoid long trips or high-speed highways.
- When It’s Too Risky to Continue Driving: If the tire is visibly deflating, the nail is located near the sidewall, or the tire is making unusual noises, it’s too dangerous to keep driving. Continuing to drive on a damaged tire could cause a blowout and lead to a serious accident.
Temporary Fixes
If you’re not able to get immediate professional help, there are a few temporary fixes that can keep you safe until you reach a repair facility:
- Tire Sealants: Products like tire sealants can temporarily seal small punctures from nails. You simply inject the sealant into the tire through the valve stem, and it can provide a short-term fix for minor punctures.
- Using a Spare Tire: If your tire pressure drops too low or you’re uncomfortable driving on a damaged tire, it’s better to switch to your spare tire. Follow your vehicle’s manual for safe instructions on changing the tire. Once the spare is on, head straight to a tire shop for repair or replacement.
These temporary solutions can help you get back on the road safely, but they are not permanent fixes. Always seek professional repair as soon as possible.
How to Fix a Nail in Your Tire at Home
Required Tools
A quick DIY fix can work for small punctures, but large or sidewall damage requires professional attention for safety.
Before attempting to fix a nail in your tire at home, gather these essential tools:
- Tire Plug Kit (includes rasp tool, insertion tool, and plugs)
- Car Jack (to safely lift the vehicle)
- Lug Wrench (to remove the tire)
- Needle-Nose Pliers (to remove the nail)
- Tire Pressure Gauge (to check pressure before and after)
- Tire Inflator (to refill the tire with air after the repair)
Step-by-Step Guide
Here’s a simple, step-by-step process to fix a small puncture caused by a nail:
- Safely Remove the Tire from the Vehicle
- Park the vehicle on a flat surface, engage the parking brake, and place wheel chocks around the opposite wheels for safety.
- Use a car jack to lift the vehicle and a lug wrench to remove the lug nuts. Carefully take the tire off the vehicle.
- Locate and Remove the Nail
- Visually inspect the tire and find the nail or object causing the puncture. Use needle-nose pliers to firmly grip the nail and pull it out of the tire. Be sure to remove any debris left in the hole.
- Prepare the Hole with a Rasp Tool
- Insert the rasp tool (included in most tire plug kits) into the puncture hole. Twist the tool back and forth to roughen up the hole’s interior, allowing the plug to adhere properly. This step ensures the tire plug will hold tightly.
- Insert the Tire Plug
- Thread a tire plug onto the insertion tool, then push it into the puncture hole. Leave about half an inch of the plug sticking out, then pull the tool back out, leaving the plug in place.
- Trim the Excess Plug: Use a utility knife or scissors to trim any excess plug material sticking out from the tire.
- Inflate the Tire and Check for Air Leaks
- Use a tire inflator to bring the tire back to its recommended pressure level. After inflating, check for any air leaks by applying soapy water to the repaired area. If bubbles form, the repair may not be secure, and you’ll need to repeat the process or seek professional assistance.
Safety Note
While fixing a nail in your tire at home can be a quick, cost-effective solution, it’s essential to remember that this is a temporary fix for small punctures in the tread area. If the puncture is larger than 0.25 inches or near the sidewall, or if you’re unsure about the repair, it’s best to take the tire to a professional. Driving on an improperly repaired tire can lead to dangerous blowouts or further damage.
When to Replace a Punctured Tire
Severe Damage
Not all punctures can be repaired. Here are some situations where replacing the tire is the safest and only option:
- Punctures Larger Than 0.25 Inches: If the nail or object has caused a hole larger than 0.25 inches, patching or plugging won’t provide a safe, long-term solution. Larger punctures weaken the tire structure, increasing the risk of blowouts.
- Sidewall Damage: The sidewall of a tire is a vulnerable area that cannot safely be patched. If the nail has punctured the sidewall, the tire must be replaced, as sidewall damage compromises the tire’s ability to maintain structural integrity, leading to potential failure at high speeds.
Signs You Need a New Tire
Sometimes, a repair may seem like a viable solution, but the tire could still be compromised. Here are signs that indicate you should replace the tire:
- Multiple Punctures: If the tire has been repaired multiple times, especially in close proximity, it’s time for a replacement. Each patch or plug weakens the tire and increases the risk of failure.
- Cracks or Bulges: Visible cracks or bulges in the tire are signs of internal damage, which could be caused by a nail puncture or poor tire maintenance. These issues make the tire unsafe to drive on.
- Tread Wear Beyond Safe Limits: If the tread depth is already worn down close to the legal limit (usually 2/32 inch), repairing the tire won’t restore its effectiveness. It’s safer to invest in a new tire rather than risk driving on worn, damaged rubber.
Continuing to drive on a compromised tire not only endangers you but also poses a hazard to other drivers. A blowout at high speeds can lead to loss of control and serious accidents.
Cost Considerations
When deciding between repairing and replacing a tire, it’s essential to weigh the costs:
- Tire Repair Costs: A typical tire repair, such as a patch or plug, will cost between $15 and $30. If multiple punctures are present or you need a tire sealant, the cost may increase.
- Tire Replacement Costs: Depending on the tire’s size, brand, and quality, a new tire may range from $80 to $300. In some cases, the overall condition of the tire—such as being worn down or having significant damage—justifies the higher cost of replacement over repeated repairs.
- Long-Term Savings: Although replacing a tire is more expensive upfront, it provides peace of mind and safety in the long run, preventing future breakdowns or dangerous situations.
Prevention Tips: Avoiding Nail Damage in the Future
Regular Tire Inspections
One of the most effective ways to prevent nail damage is by performing regular tire inspections. Here’s how you can stay on top of tire health:
- Monthly Checks: Make it a habit to inspect your tires at least once a month. Look for embedded debris, uneven wear, or visible punctures.
- Check Tire Pressure: Use a tire pressure gauge or rely on your vehicle’s Tire Pressure Monitoring System (TPMS) to ensure your tires are properly inflated. Under-inflated tires are more vulnerable to damage, while over-inflated tires can increase the likelihood of punctures.
- Spot Hidden Damage: Sometimes, small punctures from nails may not cause immediate air loss. A close inspection can help you identify these problems before they escalate.
Road Safety Awareness
Being aware of your surroundings while driving can help reduce the risk of nail damage. Consider these road safety tips:
- Avoid Hazardous Areas: When possible, steer clear of construction zones, unpaved roads, and debris-filled streets, as they often contain sharp objects like nails and screws that can puncture your tires.
- Drive Cautiously: If you must drive through such areas, do so cautiously and at a slower speed. Sharp debris is less likely to puncture your tires if you aren’t driving at high speeds.
- Stay in Well-Maintained Lanes: Whenever possible, stay in the middle of well-maintained lanes where debris is less likely to collect. Shoulders and poorly maintained areas of the road are more prone to having debris that can damage your tires.
Routine Maintenance
Routine tire maintenance and early detection are key to preventing long-term damage and ensuring safe driving.
Routine tire maintenance not only extends the life of your tires but also helps prevent serious damage caused by punctures. Here’s what you should focus on:
- Rotate Your Tires Regularly: Regular tire rotations help ensure even wear, reducing the chances of encountering weak spots that are more susceptible to punctures.
- Balance and Align Tires: Keeping your tires properly balanced and aligned prevents uneven wear, reducing the risk of nails or other sharp objects causing damage.
- Check Tread Depth: Ensure your tires have adequate tread depth to protect against punctures. The deeper the tread, the more resistant your tires are to sharp objects.
- Promptly Address Minor Issues: Address small problems as soon as you notice them. A slow air leak or slight imbalance can worsen over time, making your tires more vulnerable to further damage.
Frequently Asked Questions (FAQs)
- How long can you drive with a nail in your tire?
You can drive a short distance if the tire is holding air and the puncture is small. However, it’s crucial to get it repaired as soon as possible to avoid further damage or a potential blowout. - How much does it cost to fix a nail puncture?
On average, fixing a nail puncture costs around $15 to $30, depending on your location and whether you’re opting for a patch or plug. - What happens if you drive on a nail too long?
Driving too long on a nail can cause the tire to lose pressure gradually, leading to severe damage, increased risk of a blowout, and potentially costly repairs or replacement. - Is DIY tire repair a permanent solution?
No, DIY tire repairs are typically temporary solutions. Professional repairs are recommended for long-term safety and to ensure proper sealing of the puncture. - Can you remove a nail from your tire by yourself?
Yes, you can remove a nail yourself using pliers and a tire repair kit. However, it’s important to follow proper steps and ensure the puncture is small enough to be repaired at home. - How do you know if the nail has caused significant damage?
Check for reduced air pressure, visible tire deformities, or a clicking noise while driving. These signs indicate that the puncture may be serious and require immediate attention. - Can a nail puncture be repaired if it’s near the sidewall?
No, punctures near or on the sidewall cannot be repaired. In such cases, the tire will need to be replaced to ensure safety. - How can you prevent nails from damaging your tires?
Regular tire inspections, maintaining proper inflation, and avoiding debris-filled or hazardous areas can reduce the risk of nail punctures. - What is the difference between a plug and a patch for tire repair?
A plug is used for small punctures in the tire’s tread and can be a quick, temporary fix. A patch involves sealing the hole from the inside of the tire and is generally more durable and long-lasting. - How often should you inspect your tires for nails or punctures?
It’s recommended to inspect your tires at least once a month, especially after driving through areas with debris or construction zones. - Can driving on a punctured tire damage the wheel?
Yes, if you continue driving on a flat or severely underinflated tire, it can damage the wheel, leading to more expensive repairs. - When should you replace a tire with a nail puncture instead of repairing it?
If the puncture is larger than 0.25 inches, located near the sidewall, or if the tire has multiple punctures, it is safer to replace the tire rather than attempting repairs.
Conclusion
Finding a nail in your tire but not experiencing a flat can be concerning. Remember to assess the situation by checking for air pressure, looking for visible damage, and listening for unusual sounds. If the puncture is small and the tire holds air, you may be able to drive slowly to a repair shop. If you opt for a DIY fix, follow the proper steps to safely remove the nail and plug the puncture. However, be aware that some punctures, especially those near the sidewall or larger than 0.25 inches, will require tire replacement.
Final Advice:
Always prioritize safety by seeking professional assistance whenever you’re unsure about the condition of your tire. Regular tire maintenance and inspections can help prevent future issues and keep you safe on the road. Remember, your tires are crucial for vehicle performance and safety, so take the necessary steps to ensure they remain in good condition. Stay proactive, stay safe, and enjoy your drive!


